
Jewelry Glue and Epoxy for Gemstones and Metal

Aleene's Jewelry and Metal Glue works great for gluing tumbled gemstones to metal jewelry findings. It has a pointed applicator tip for dispensing the glue.
Glues for Tumbled Stone Jewelry
If you visit a craft store to purchase glue for a jewelry craft project you will probably be surprised at the enormous number of glues that are offered for sale. We recently visited a Michaels craft store and a Hobby Lobby to see what we would find. We found at least fifty different varieties of glue in each of these stores. We were shocked that so many glues were being offered for sale.
Why so many varieties?
Each type of glue performs best on specific materials (such as metals, glass, paper, etc.) or under different conditions (smooth surfaces, porous surfaces, indoor, outdoor, etc.). In addition, many different glue manufacturers are trying to earn your purchase.
We purchased several glues that we thought would work well and brought them back for testing. While we were at the store we were looking for glues with these characteristics:
- clear
- suitable for use on tumbled stones and metal jewelry findings
- delayed bonding (allows time to position)
- "viscous consistency" (not runny) for controlled application
- easy to use
Glues That We Like Best
We went to the store looking for something specific: a glue that could glue a smooth, non-porous tumbled stone to a metal jewelry finding.
We brought them home and tested them by gluing tumbled stones to the keychain, necklace, bracelet, and tie tack findings that we sell on this website.
Three products, Aleene's Jewelry and Metal Glue, Gorilla Glue, and Loctite Super Glue (gel control formula) performed to our satisfaction.
Photos of the products in their store packaging are shown on this page. (All three of these products are very popular and you can probably find these at a craft store or department store near you - the WalMart near our office sells all of these glues.)
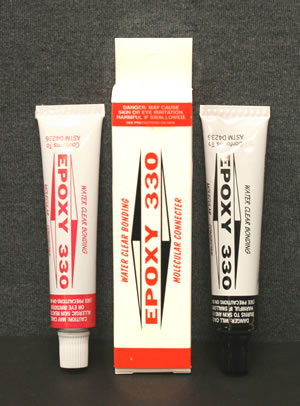
Epoxy 330 is a two-part epoxy resin that is very easy to use. It dries very fast and works great for almost any jewelry project. We have been using it for decades on all of our gemstone jewelry projects. We like it because it dries crystal clear and that hides our mistakes! It thickens in just 15 minutes and hardens in 2 hours.
We Also Have a Favorite Epoxy
Our favorite epoxy is named "Epoxy 330", it is a product that we have used since the 1970's for bonding gem materials to metal findings. It also works great for invisible bonding of glass, china, ceramics, and other non-porous materials. It is our first choice - above any glue - for bonding tumbled stones to metal findings.
We still have tumbled stone and cabochon jewelry that we made using Epoxy 330 in the 1970's and the stones have held firmly in their findings. That's darn near 50 years! We can't make any guarantees that you will get the same results - but - if you use the product according to instructions, prepare the surfaces that will be bonded together, and not expose the jewelry to temperature extremes or rough use, the product will work well.
About Using Epoxy
Epoxy is different from glue. You can apply glue directly to the items that you want to bond together. However, epoxies are two-part adhesives. When you purchase them, there are two bottles or two tubes in the package (see accompanying photo above). You mix them together to activate them.
When using Epoxy 330, we get a small piece of scrap cardboard and a flat toothpick. We then place one drop of the "Part A" liquid on the cardboard, then an equal size drop of the "Part B" liquid right next to it on the cardboard. We then use the toothpick to mix "Part A" and "Part B" together.
Once the two parts are mixed together, you have a few minutes to apply the mixture to your stone or to your finding and place them together. Drying time is "overnight".
Epoxy 330 can be hard to find in local stores. However, if you search Google for "Epoxy 330" you should find a number of online sellers.
The image above shows a few pendants that we made using our tumbled stones and necklace kits. Medium-size stones from our polished stones mixtures also work well as pendants.
Tips for Gluing Stones to Findings
TIP #1: Prepare your work station! We do this type of work on a piece of clean cardboard. We cut a piece of cardboard about 12 inches x 8 inches from a used shipping box and place it clean-side-up on our table top. We also get a couple paper towels in case we need them. You will be very glad that you have done these preparations if you drop a glue-coated part or squeeze too much glue out of the tube. Accidents happen to everyone.
TIP #2: If you are gluing bell caps or another finding that must be bent to fit the stone, do that bending - and test carefully - before you open the tube of glue. You don't want to do that type of work in a hurry or adjust the bend of a glue coated part!
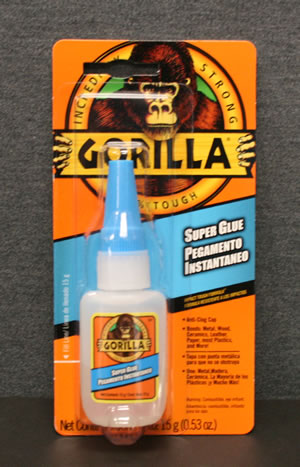
Gorilla Glue is an extremely popular brand of glue and is available in craft stores, home improvement stores, hardware stores and department stores everywhere.
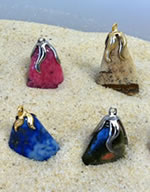
Then apply glue to a bell cap, press the bell cap onto a stone, and press the stone into the sand. That will put it in a great position for the glue to dry.
TIP #4: Use a tiny piece of transparent tape to hold parts in place after gluing. The transparent tape will allow you to see through and confirm alignments.
Cut the tape to desired lengths before you open the tube of glue and stick them on the edge of your table. It is now ready to grab when your parts are in alignment.
TIP #5: Small clamps also work great for holding pieces that are curing. We use small plastic clamps with spring-loaded jaws to hold parts together while the glue is setting. They hold firmly and can be operated with one hand. Practice clamp placement in advance.
TIP #6: For best results, use fine sandpaper to rough up the surfaces that are to be glued. Glue and epoxy always adhere better to a slightly rough surface than to a perfectly polished tumbled stone! You only need to rough up the part of the stone where the glue will be in contact.
Happy Tumbling!
RockTumbler.com Authors
 |
Hobart M. King has decades of rock tumbling experience and writes most of the articles on RockTumbler.com. He has a PhD in geology and is a GIA graduate gemologist. He also writes the articles about rocks, minerals and gems on Geology.com. |