
Polished Stone Necklace Kits
Instructions for using bell caps and epoxy to make a necklace pendant.
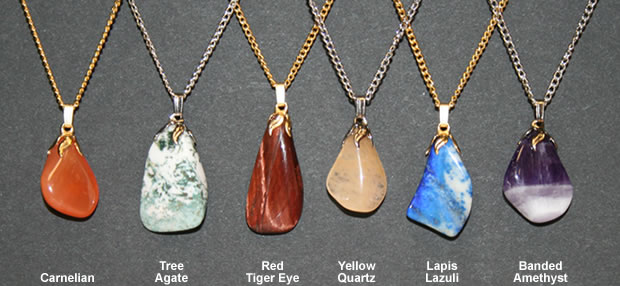
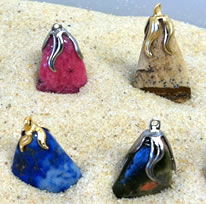
The image above shows some of our favorite necklace pendants. We made them using stones listed in the polished stone menu at right. The stones pictured above from left to right are: Carnelian agate, tree agate, red tiger eye, yellow quartz, lapis lazuli and banded amethyst. Medium-size gems from our polished stones mixtures also work well as pendants.
|
Introduction
Can't find that perfect necklace to go with your new dress? We have the solution! Make your own beautiful polished-stone necklace. Making a polished stone necklace is a simple craft that you can do at home. The best part about making your own necklace is that you know the pendant will match your dress nicely because you picked out the stone.


Step 1: Supplies to make a necklace
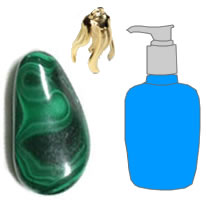
- Tumbled stones (we recommend medium-size stones)
- Necklace, Bell Cap and Bail: (Purchase necklace parts)
- Epoxy, a small piece of cardboard, and a mixing stick
- Sandpaper
- Soap and water
- Sand or clay (recommended)
Step 2: Choosing a stone
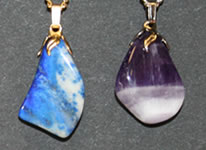
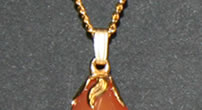
The color and shape of the stone are the main aspects to consider when picking out which stone to use. First look for stones that have a color that matches your dress. Then from those stones, pick one with an aesthetic shape that tapers to a point that will work well with a bell cap.
Check out the picture at left to help visualize what we are talking about. The stone doesn't have to be the exact shape of the bell cap, because you will be adjusting the shape of the bell cap in the next step.
Step 3: Preparing the stone and bell cap
The first thing to do when preparing the stone and bell cap is shape the bell cap to fit the stone properly. Do this by placing the bell cap on the edge of the stone where you plan to glue it, and then gently bend the bell cap fingers so that they come into full contact with the stone. This can be done without using tools; however, it is much easier to get a perfect fit by using a tool (such as a burnisher) to bend the prongs around.
Now that the bell cap is shaped to the stone, it is necessary to lightly sandpaper the parts of the stone where the bell cap will be attached. This light sanding will provide a rough surface for the glue to adhere. After sanding, clean both the bell cap and stone using a detergent or mild solvent. This will remove oily fingerprints and residue that may prevent the epoxy from adhering properly to the stone and bell cap.
Step 4: Using epoxy to attach the bell cap to the stone
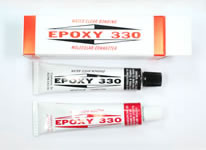
With the bell cap and polished stone now clean and dry, it is time to attach them to one another. We use Epoxy 330, but there are many other types of jewelry glue (we review several types of glue here). To use Epoxy 330, place one drop of Part A (the resin) on a piece of cardboard, then put one drop of Part B (the hardener) next to it and mix them thoroughly. We often use a paperclip or toothpick to mix the two parts.
Now that the epoxy is mixed, it is time to attach the bell cap to the stone. Using your chosen stirring utensil, spread a small amount of epoxy on each finger of the bell cap. Cover each finger of the cap (on the side that will touch the stone) with a thin coat of the epoxy. Now place the bell cap on the stone in the same location where you adjusted the finger shapes.
The epoxy takes 15 minutes to set and about two hours to harden. Here is where the sand or clay comes in handy. Place the stone in the sand or a lump of clay so the bell cap is level and won't slide out of place. (Make sure that sand does not come in contact with the epoxy because it will harden around the sand.)
Step 5: Attaching the stone and bell cap to the necklace
After the epoxy has fully hardened, you can attach the bail to the bell cap. This is done by squeezing the bail and sliding the narrow end through the loop of the bell cap. Then thread the necklace chain through the bail. Now you have your very own one-of-a-kind polished-stone necklace that goes perfectly with that new dress!
RockTumbler.com Authors
 |
Hobart M. King has decades of rock tumbling experience and writes most of the articles on RockTumbler.com. He has a PhD in geology and is a GIA graduate gemologist. He also writes the articles about rocks, minerals and gems on Geology.com. |