
Polished Stone Bracelet
Step-by-step instructions for making a polished stone bracelet.
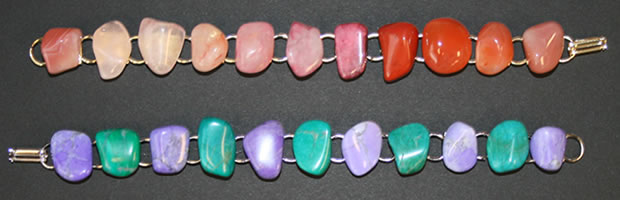
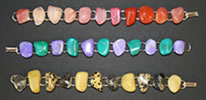
The image above shows two of our favorite bracelets made using a bracelet findings and small stones from our collection. The top bracelet shows a "spectrum" of orange colors using carnelian agate, crackle quartz and apricot agate. The bottom bracelet was made using some beautifully dyed howlite in shades of green and purple.
|
Introduction
If you have a nice collection of tumble polished stones and want to show them off, use them to make a tumbled stone bracelet. A tumbled stone bracelet is an artistic and fashionable way to display your beautiful stones. It is a very easy craft project and makes a nice gift.

Step 1: Supplies to make a bracelet
- Tumbled stones (bracelets pictured above are made with small stones)
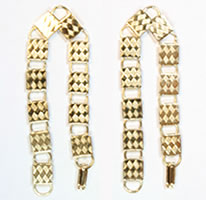
- Bracelet: (Purchase bracelet parts)
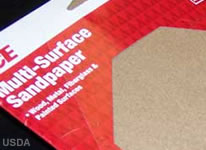
- Sandpaper
- Epoxy, a small piece of cardboard, and a toothpick
- Small round-nose pliers (recommended): Used for adjusting the length of the bracelet.
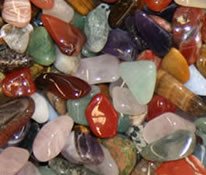
Step 2: Choosing the right stones
Choose some stones that look good and will fit on the bracelet nicely. The shape, color and luster of the stones will make all the difference in the final project. You may want a spectrum of colors, two alternating colors or all stones the same color. Let your creativity guide you.
The size and shape of the stone is important when it will go on a bracelet. First of all, you want a stone that has a relatively flat back for a larger surface-to-surface contact between the bracelet pad and the stone. As for the size, make sure the stones aren't too large. There will be a number of stones on the bracelet, and if the stones are too large it will be heavy (for a bracelet). Also if the stones are too large, they are more likely to accidentally bang into objects which may cause them to pop off.
Step 3: Preparing the bracelet and stones
The first thing to do when preparing the stones is sanding. Give a light sanding to the stone on the side that is going to be glued to the bracelet. The purpose of sanding the stones is to rough up the stone surface slightly so that the epoxy has some small nooks and crannies to get into and better hold the stone to the bracelet. It is not necessary to sand the bracelet pads because they have a textured face already.
It is best to make sure the bracelet fits before gluing on the stones because your design may be altered by removing a pad and stone once the bracelet is done. To shorten the bracelet it is necessary to remove one or more of the pads and rings. To do this, use the small round-nose pliers to pry open and remove one of the rings between two pads. Pry open the next ring over and remove the unneeded pad. Now you can slip the open ring into the pad on the end and twist it closed. You can remove multiple pads and rings if needed. To make a bracelet longer, simply add one or more pads and rings from another bracelet.
Now that the stones have been sanded and the bracelet length has been adjusted, it is time to clean the bracelet to remove oily fingerprints and sanding residue. Clean the stones using either a detergent or a mild solvent. Not cleaning the sanding particles and oily fingerprints off the stones and bracelet may result in a weak bond between the stone, epoxy, and bracelet, increasing the chance of the stone coming off.
Step 4: Attaching stones to the bracelet with a two-part epoxy
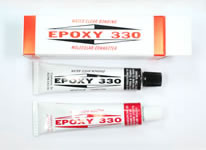
We use a two-part epoxy to attach stones to jewelry findings. Epoxy 330 or a similar product (we review several types of glue here) works great for attaching polished stones to jewelry because it dries clear, is very strong and is long lasting. Epoxy 330 has two parts: Part-A, the resin and Part-B, the hardener. To use the epoxy put one drop of Part-A and one drop of Part-B next to each other on a piece of cardboard. Mix both parts together thoroughly with a toothpick.
Once the two parts are mixed, apply a light coat of epoxy to the sanded portion of the stone and to the bracelet pad. Place the epoxied side of the polished stone onto the bracelet pad. If the stone does not stay in place on its own you will need to hold it in place until the epoxy starts to set. The epoxy takes about 15 minutes to set and about 2 hours to harden.
Repeat the above steps for each stone that you will attach to the bracelet.
Enjoy Your Bracelet!
Once all of your stones are attached and the epoxy has hardened, it is time to show off your one-of-a-kind creation. Or, if you made the bracelet as a gift for someone, it's time to put a smile on their face by presenting them with their beautiful tumbled stone bracelet.
RockTumbler.com Authors
 |
Hobart M. King has decades of rock tumbling experience and writes most of the articles on RockTumbler.com. He has a PhD in geology and is a GIA graduate gemologist. He also writes the articles about rocks, minerals and gems on Geology.com. |