
How to Make a Polished Stone Keychain
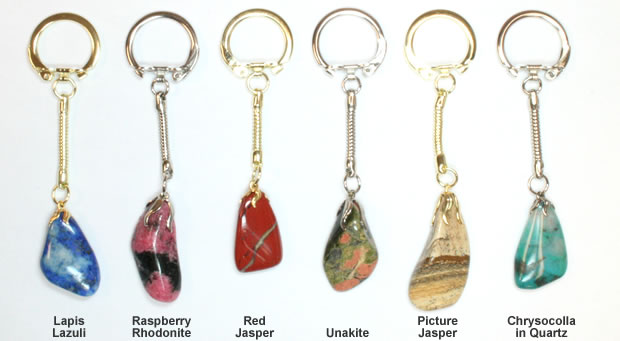
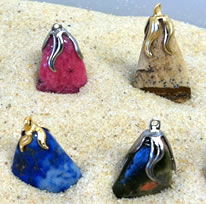
The image above shows some of our favorite keychains. The stones used are from the "Polished Stones Menu" on the right side of this page. The medium-size stones from our tumbled stone mixtures also make great keychains. The stones pictured above from left to right are: lapis lazuli, raspberry rhodonite, red jasper, unakite, picture jasper and chrysocolla in quartz.
|
Introduction
Making a polished stone keychain is a fun and easy craft project you can do yourself or with friends. The keychains make great gifts. Or, you can turn your lucky stone into a keychain that will always be with you. A polished stone keychain is a beautiful piece of art and a functional item at the same time.

Step 1: Supplies to make a keychain
- Tumbled stones (our medium-size stones work well)
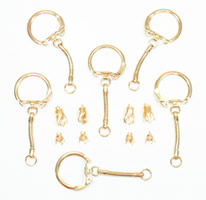
- Keychain and bell caps: (Purchase keychain parts)
- Epoxy, a small piece of cardboard, and a toothpick
- Round-nose pliers (recommended): Makes shaping of the bell cap and opening the jump ring easier.
- Sandpaper (recommended)
- Sand or clay (recommended)
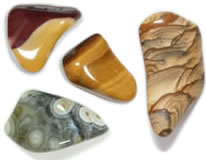
Step 2: Choosing a stone
When picking out a stone for a keychain, the main thing to consider is the shape of the stone. You will be attaching a bell cap to the stone, so the stone should have a narrow tip. The narrow tip will allow the bell cap to be easily shaped around it, so that the end of the stone fits snugly in the bell cap, and all of the bell cap fingers will be in flat contact with the surface of the stone.
If you have a stone with a shape that does not accept all fingers of the bell cap, don't give up. You can always snip off one or two of the bell cap fingers. However, make sure that the fingers that are left fit fully on the stone so that when glued on, the bell cap holds tightly.
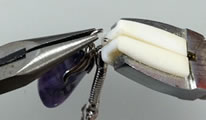
Step 3: Preparing the stone and bell cap
Now that you have your stone picked out, you need to prep the stone and bell cap for gluing. The first thing to do is shape the bell cap around the stone, making sure that all fingers of the bell cap touch the stone. It is possible to shape the bell cap with your fingers, but using the recommended round-nose pliers will make the job much easier and give you a better fit. Don't worry about bending the bell cap. Bend it so its fingers come in flat contact with the stone. That will make a strong glue joint.
You may also choose to use a piece of sandpaper to gently abrade the areas of the stone that the bell cap will be glued to. A rough surface has a texture that the glue can "grab" onto.
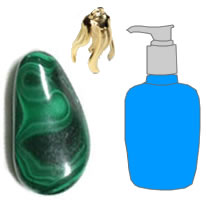
Next, clean the stone and bell cap. Use a detergent or a mild solvent that will remove any fingerprints, oils or other residue that might be on the bell cap or gemstone. Oily fingerprints can reduce the bonding effectiveness of any glue. Make sure the stone and bell cap are completely dry before using the epoxy.
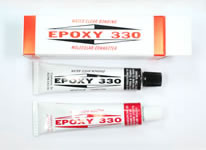
Step 4: Using a two-part epoxy
The gemstone and bell cap are now ready to be joined together into a one-of-a-kind keychain. We use Epoxy 330 to affix stones to jewelry findings because it dries clear, and it is very durable and long-lasting (we review several types of glue here). Epoxy 330 is a two-part epoxy. Part A is the resin and Part B is the hardener. To use this epoxy, put one drop of Part A and one drop of Part B onto a piece of cardboard and mix them together thoroughly. We use a toothpick or paper clip to mix the two parts together. Make sure that when you put Part B on the cardboard, the tip of the tube doesn't come in contact with Part A because the tip will harden closed.
Step 5: Putting the stone and bell cap together
Now that your epoxy is mixed, it's time to put the bell cap on the stone. Using your toothpick or paper clip, put a light coat of epoxy on the bell cap. Make sure all of the fingers of the bell cap have epoxy on them. Take the epoxy-covered bell cap and place it on the part of the gemstone it was shaped around.
The epoxy takes about 15 minutes to set and 2 hours to harden. This is where the recommended sand or clay comes in very handy. Once the bell cap and stone are together, place the stone in the sand or into the clay so that the bell cap is sticking straight up. If the stone is not straight up, the bell cap has a tendency to slide out of place because the epoxy is still in liquid form. This is why we recommend using the sand or clay.
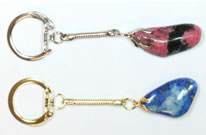
Step 6: Attaching the stone and bell cap to the keychain
Once the epoxy has hardened, it is time to attach it to the keychain. Using the round-nose pliers, open the jump ring on the keychain by pushing one side of the opening backwards and pulling the other side forwards. DO NOT PULL IT APART. If you pull it apart, it is very difficult to get the ring to close properly. (It is easiest to open and close a jump ring if you have two pairs of pliers.) Now that the ring is open, slide the bell cap loop onto the jump ring and bend the jump ring closed.
Step 6: Enjoy what you have made
Once the epoxy has hardened, it is time to enjoy your one-of-a-kind keychain creation. If the keychain is for yourself, then maybe the stone on it will become your lucky stone. Also, as mentioned earlier, a handmade keychain makes a great gift. Anyone who has a drawer full of loose keys needs several keychains!
RockTumbler.com Authors
 |
Hobart M. King has decades of rock tumbling experience and writes most of the articles on RockTumbler.com. He has a PhD in geology and is a GIA graduate gemologist. He also writes the articles about rocks, minerals and gems on Geology.com. |