Snowflake Obsidian and Black Obsidian
Rock Tumbler Rough
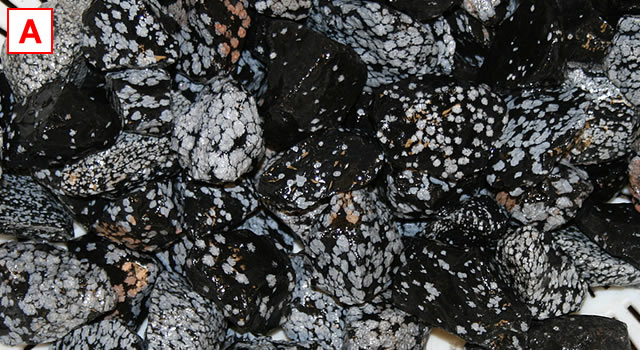
This photo shows a sample of our snowflake obsidian tumbling rough, dumped into a colander and sprayed with water to reveal its full color. Click on the image for a larger view.
Snowflake Obsidian Tumbling Rough
 ,
,  , and
, and  What do they mean?
Size: mostly 1/2 to 2 inch pieces
What Is Snowflake Obsidian?

Here are a few pieces of snowflake obsidian that we tumbled. It shapes quickly in a tumbler and produces bright black tumbled stones with gray to white snowflakes.
What causes the snowflakes? Immediately after the rock formed, it was completely black. Over time, some of the glass started to alter into crystals of cristobalite, a white to gray mineral. So the white "snowflakes" are patches of cristobalite crystals within the volcanic glass.
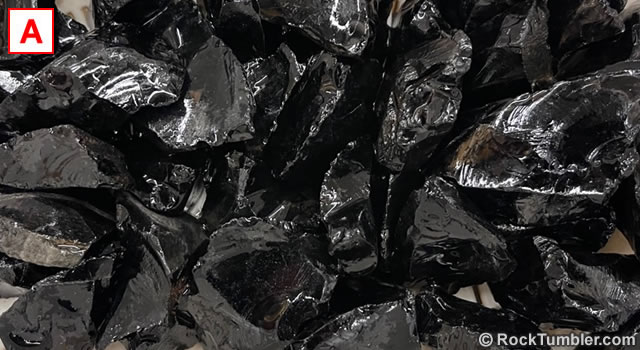
This image shows a bag of black obsidian tumbling rough, dumped into a colander and sprayed with water to reveal its full color. Click on the image for a larger view.
Black Obsidian Tumbling Rough
 ,
,  , and
, and  What do they mean?
Size: mostly 1/2 to 2 inch pieces
What Is Black Obsidian?
Black obsidian is simply plain black obsidian in which the "snowflakes" of cristobalite did not begin to form. The same tumbling recipe can be used for both types of obsidian, since they share the same physical properties.
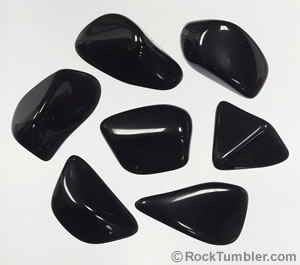
Here are a few pieces of plain black obsidian that we tumbled. As you can see, the jet-black tumbled stones have a nice "glassy" shine.
Does It Tumble Well?
Obsidian has a Mohs hardness of about 5 1/2 to 6. It is quite a bit softer than agate and jasper. That enables it to shape quickly in a rock tumbler. One week in a rotary tumbler in medium grit is enough time to round off all of the sharp edges and produce nicely rounded stones. Then about four or five days in fine grit will have it ready to polish.
We always use TXP aluminum oxide polish when tumbling obsidian. It produces an excellent polish in six to seven days in rotary.
ADVANCED Rock Tumbling Recipe:
Obsidian (1/2 to 2 inches)
These pieces of obsidian are about 1/2 to 2 inches in size and have a Mohs hardness of about 5 1/2. That is softer than most types of rocks that are processed in a rock tumbler. Obsidian also bruises easily if it is not cushioned. To accommodate these properties we do three things: 1) skip the coarse grit step; 2) tumble for a shorter amount of time; 3) add plenty of media for cushioning.
1) Skip Coarse Grit: Coarse grit will quickly reduce the size of obsidian. So we skip the coarse grit step and begin our tumbling with medium grit (150/220 mesh).
2) Less Time: We also shorten the tumbling time in the first step. Instead of two weeks in 150/220 grit, we reduce that to 5 to 8 days. We also reduce the time in fine grit (500 mesh) to 5 days. Polishing time is not changed.
3) Media Needed: Obsidian bruises easily. To prevent bruising, it should be swimming in a sea of small ceramic cylinder media. We use at least 50% ceramic cylinder media and 50% obsidian. The cylindrical shape of the ceramic media enables it to act like roller bearings and provide a smooth tumbling action in the barrel. The many small pieces of media will also reduce the impact forces that occur in the barrel and deliver grit to all surfaces of the rough.
Recipe for Rotary Tumbling
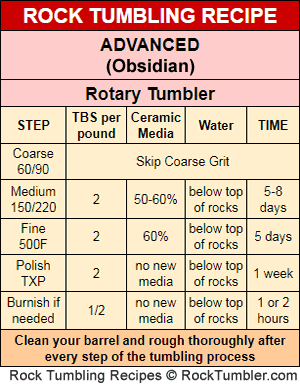
Coarse Grit Step:
Obsidian is extremely "soft" so you do NOT need to use coarse grit.
Medium Grit Step:
Two tablespoons medium grit (150/220) per pound of rock and ceramic media. Add enough water to barely cover the rocks. You want 50-60% media and 40-50% obsidian. Let this tumble for 5-8 days. Rinse, clean and inspect the material. Tumble longer if more smoothing and shaping is desired.
Fine Grit Step:
If more media is needed to maintain barrel capacity, that media should be broken in (rather than brand-new media with rough edges). Again, two tablespoons of fine grit (500F) per pound of rock and ceramic media. Add water to below the top of the rocks. Tumble for five days.
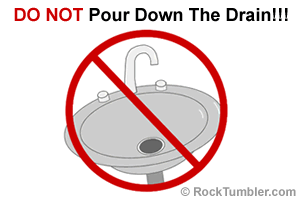
Barrel slurry dumped down the drain will harden like concrete.
IMPORTANT: Make sure that your barrel and rough have been cleaned thoroughly. Any grit carried over from a previous step will likely ruin your polish. Do not add more media at this point.
Measure two tablespoons of TXP Polish per pound of rock and ceramic media. Fill with water to just below the top of the rocks. Tumble for seven days.
Burnish If Needed:
Obsidian usually takes a great polish. However, burnishing this material after the polish step can often improve the shininess of the finished stones. If you would like to try burnishing to see if it improves the look of your polished stones, full burnishing instructions can be found here.
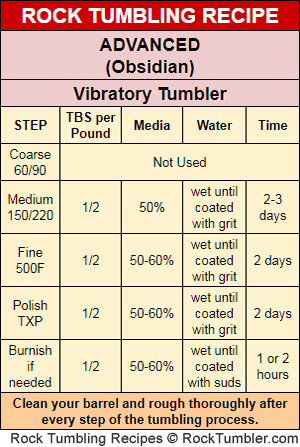
Vibratory Tumbler Recipe:
Coarse Grit (60/90 Mesh):
Coarse grit is not used in a vibrating rock tumbler.
Medium Grit (150/220 Mesh):
Obsidian is a fragile material that can easily be bruised or chipped. It is recommended that you use a minimum of 50% ceramic media. The use of this media will aid in the tumbling action in the barrel and help deliver grit to all surfaces of the rough. Also, the more media, the better the cushioning.
After you have your bowl loaded to the manufacturer's recommended level, add 1 tablespoon of grit for every two pounds of material, including the media, in the bowl. While the tumbler is running, slowly add water until the material has a thin coat of wet grit and the tumbling action is smooth and fast in the bowl.
Check the bowl every 8-12 hours to ensure that the action is still good. If the action has slowed, add water a little at a time until the action is back to normal. If the mud gets too thick, you will need to do a complete rinse of the material and bowl. After rinsing, add fresh grit and water and start tumbling again. You are done with medium grit when you are satisfied with the shape and smoothness of the stones. Usually 2-3 days for us with this material. Give the material and bowl a thorough cleaning before moving on to fine grit.
Fine Grit (500F Mesh):
Place your material back in the tumbler bowl, then add enough polished ceramic media to bring the load up to the manufacturer's recommended operating level. This will also get you near the recommended 50% ceramic media. Add one tablespoon of grit for every two pounds of material in the bowl. Then, turn the tumbler on and slowly add water until the material has a thin coat of wet grit and the tumbling action is smooth and fast in the bowl.
Open the bowl every 8-12 hours to check that the action is still good. We usually run fine grit for 48 hours. Thoroughly clean the bowl and material before moving to the polishing step.
Polish (#61 Rapid Polish or TXP):
Place the cleaned material back in the bowl. If needed, add ceramic media that has been previously polished, to bring the bowl up to the manufacturer's recommended operating level. Add one tablespoon of grit for every two pounds of material in the bowl. Turn on the tumbler and slowly add water. Stop adding water when the material has a thin coat of wet polish and the tumbling action is smooth and rapid.
Like the previous grit steps, open the bowl every 8-12 hours to check the tumbling action. Add water if it has slowed. We have found that 48 hours is usually all the time you need to get a good polish on this material in a vibratory tumbler.
Burnish If Needed:
This rough will usually take a great polish. However, burnishing this material after the polish step can often improve the look of the finished stones. If you would like to try burnishing to see if it improves the look of your polished stones, full burnishing instructions can be found here.
Finished Snowflake Obsidian Tumbled Stones:
If you don't want to tumble this material yourself, we usually have medium size (5/8" to 1") tumbled stones of snowflake obsidian for sale by the pound. You can find them here.
Customers also bought...
Large Ceramic Media

Small Ceramic Media

Standard Grit Kit


