Our Media Bucket

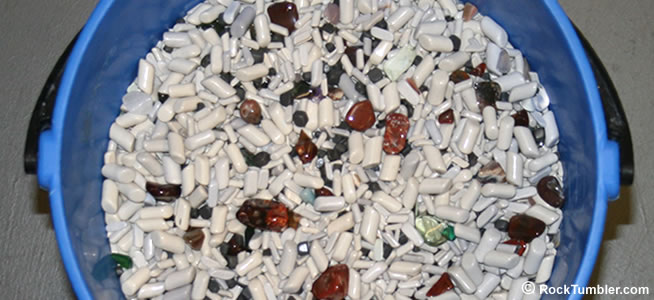
This is looking into our media bucket. Notice there are all different sizes of ceramic media and some small tumbled stones. A range of media sizes works great for cushioning, particle size balancing, filler, and improving the tumbling action in your barrel.

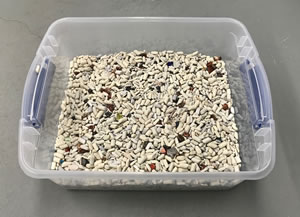
We started out with a media bucket. Soon we had two of them. Then we discovered that these inexpensive plastic bins work even better. They have a lid that prevents contamination. When the lid is on, you can stack the bins for more efficient storage. Click the image to enlarge.
We Always Use Media
Our goal is quality rather than quantity when we tumble. We tried ceramic media a number of years ago and are thankful that we did. It has saved us much time and disappointment. We get higher quality stones and have fewer stones that need a second run through the tumbling process.
We use media in every batch of rocks that we tumble. During the coarse grit step, we start with about 10% media (by volume) for most materials. Then after the coarse grit step, we add enough media to bring the barrel up to operating capacity. This makes up for the volume lost during grinding. We do the same after the medium grit step.
During the fine grit and polishing steps we run at least 50% media for materials that bruise easily such as obsidian, glass, opal, goldstone, and any variety of crystalline quartz (amethyst, rose, aventurine, smokey, quartzite, tiger's-eye, etc.). We also use at least 50% media during the fine and polish steps for any material that has cleavage or is brittle such as feldspar, topaz, mookaite, and fluorite.
You can learn more about how we use media in this article.
Media Bins and Buckets
Every time we wash up a finished batch of tumbled stones, we dump the stones and the media on large towels and allow them to dry. We then separate the stones from the media and store the media in a bucket or a covered bin until we are ready to use it again.
In addition to ceramic media, our media bucket also contains a lot of stones that have already been tumbled. These are stones that are smaller than we desire or stones that can be improved by going through the tumbling process again. Small stones make great tumbling media. If we see great stones in our media bucket, they get pulled out and put in our collection or added to the tumbled stone mixtures that we sell.

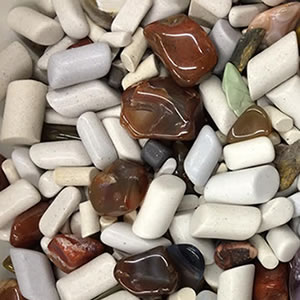
Here you see some Lake Superior Agates and a few other tumbled stones mixed in our media bucket. We use stones that are not quite ready as media. They work like media and have a chance to become high-quality stones.
A Range of Sizes in Our Media Bin
Our media is constantly being recycled. We have learned through tumbling many batches of rough that a mix of media sizes works best. It gives us great results, and we don't have to separate the media by size. We simply separate the media from the polished stones and keep them in a bucket until the next time we load a tumbler barrel.
When our media bucket is below about 1/2 full, we add a little bit of new media to the coarse grit step of the next few batches of stones that we tumble. We always add large media.
Why do we always add large?
Because large media is less expensive than small media -- and because it will become small media after a couple months of tumbling.
A CAUTION ABOUT NEW MEDIA
We never add new media to the fine grit step or polishing step of our rock tumbling. New media is not perfectly smooth and can have rough edges. It is best introduced to the tumbling process at the coarse grit step; then any rough edges will be smoothed by the time that it reaches the polishing step.
Always use broken-in media in fine grit and polish.

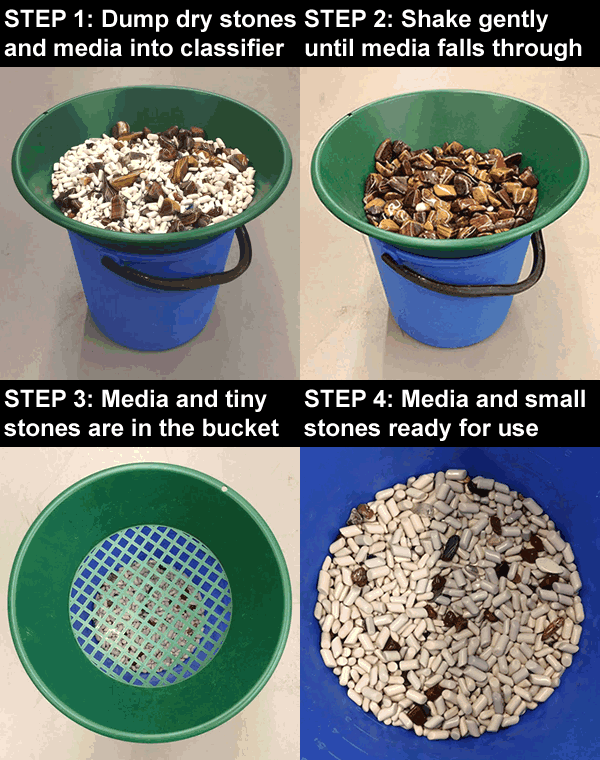
A short photo sequence showing you the process of separating the media and tumbled stones using a classifier and bucket. Want a classifier? Get one here.
Separating Media from Stones
It can take a lot of time to separate tumbled stones from media by hand. We found a much faster way to do it.
We place a classifier over the top of a plastic bucket, pour in our dry stones and media, give the classifier a few shakes, and the media and tiny stones fall through. We use a 14" classifier. It has openings that are 7/16" across (measured on the diagonal). This size opening is good for us because we prefer stones that are larger in size.
If you enjoy small stones or know someone who does, dump the media bucket out on a towel and go prospecting for gems. They can be beautiful in a jar and work great for a variety of craft projects.
Our setup works best if the stones and media are dry, so after tumbling we spread the stones and the media on thick towels to dry. When they are dry we place a classifier on top of our media bucket and make sure it is steady enough not to flip or tip over. We then pour the mix of dried tumbled stones and media into the classifier. We shake the classifier gently to allow the media and undersize stones to fall through into the bucket.
You might need to move the material around by hand to get the last few small stones and ceramic media to fall into the bucket. At this point you have a classifier full of polished stones and a bucket of media ready for your next batch of tumbled stones.
The classifier and media bucket have saved us a lot of time and made tumbling more enjoyable. One final tip... if you use a media bucket, cover the top between uses to reduce the chance of dust or contaminants getting in. A plastic bag pulled over the top of the bucket can work great. Carefully lift the bag off of the bucket when you are ready to get a scoop of media.
Happy Tumbling!
RockTumbler.com Authors
 |
Hobart M. King has decades of rock tumbling experience and writes most of the articles on RockTumbler.com. He has a PhD in geology and is a GIA graduate gemologist. He also writes the articles about rocks, minerals and gems on Geology.com. |

